In the previous article I wrote about creating a Solaris 11 zone. This article will explain the steps to install iPlanet Web Server 7.0.14 in the zone.
1) Obtain a copy of iPlanet Web Server from Oracle website, the file name is Oracle-iPlanet-Web-Server-7.0.14-solaris-x86.zip. Get the update 14 here. Save the downloaded file into a directory that is accessible from the non-global zone. Best way is to place the file into a NFS share that can be accessed from the non-global zone.
2) Login to the local zone as non-root and copy the file into a temp folder.
admin@websvr01:~$ scp admin@192.168.1.2:~/Oracle-iPlanet-Web-Server-7.0.14-solaris-x86.zip .
The authenticity of host '192.168.1.2 (192.168.1.2)' can't be established.
RSA key fingerprint is cf:b0:3d:35:a5:be:4a:57:0b:4a:5e:64:94:96:66:1e.
Are you sure you want to continue connecting (yes/no)? yes
Warning: Permanently added '192.168.1.2' (RSA) to the list of known hosts.
Password:
Oracle-iPlanet-Web-S 100% |*****************************| 160 MB 00:06
admin@websvr01:~$3) Unzip the file. You may need to perform unzip twice because the setup executable is inside a zip file after the first unzip.
admin@websvr01:~$ pwd
/home/admin
admin@websvr01:~$ ls
Oracle-iPlanet-Web-Server-7.0.14-solaris-x86.zip
admin@websvr01:~$ unzip Oracle-iPlanet-Web-Server-7.0.14-solaris-x86.zip
Archive:  Oracle-iPlanet-Web-Server-7.0.14-solaris-x86.zip
   creating: 145844-07/
 extracting: 145844-07/Oracle-iPlanet-Web-Server-7.0.14-solaris-x86.zip
  inflating: 145844-07/README.145844-07
  inflating: 145844-07/LEGAL_LICENSE.TXT
  inflating: 145844-07/145844-07.html
admin@websvr01:~$
admin@websvr01:~$ ls
145844-07
Oracle-iPlanet-Web-Server-7.0.14-solaris-x86.zip
admin@websvr01:~$ cd 145844-07/
admin@websvr01:~/145844-07$ unzip Oracle-iPlanet-Web-Server-7.0.14-solaris-x86.zip
admin@websvr01:~/145844-07$ ls -la
total 329601
drwxr-xr-x   4 admin    staff         10 May 11 21:36 .
drwxr-xr-x   4 admin    staff          7 May 11 21:33 ..
-rw-r--r--   1 admin    staff       8640 Feb 19 17:25 145844-07.html
-r--r--r--   1 admin    staff      18775 Sep 18  2010 LEGAL_LICENSE.TXT
drwxr-xr-x   2 admin    staff          3 Feb 14 17:08 Legal
-rwxr-xr-x   1 admin    staff    168513779 Feb 14 22:42 Oracle-iPlanet-Web-Server-7.0.14-solaris-x86.zip
-rw-r--r--   1 admin    staff       6758 Feb 19 17:25 README.145844-07
-rw-r--r--   1 admin    staff        786 Feb 14 17:08 README.txt
drwxr-xr-x   3 admin    staff         15 Feb 14 18:27 WebServer
-rwxr-xr-x   1 admin    staff      34304 Feb 14 17:08 setup
admin@websvr01:~/145844-07$
We are going to install the web server with 'admin' user rather than the 'root'. Run the setup and accept all default answers, the only thing you need to specify is the admin server password. The installer will detect if you have an X11 environment to bring up the GUI otherwise it will fall back to the console mode. So don't bother specify any command-line option for the setup command.
admin@websvr01:~/145844-07$ ./setup Welcome to the Oracle iPlanet Web Server 7.0.14 installation wizard. Copyright (c) 2007, 2010, Oracle and/or its affiliates. All rights reserved. Oracle and Java are registered trademarks of Oracle and/or its affiliates. Other names may be trademarks of their respective owners. You will be asked to specify preferences that determine how Oracle iPlanet Web Server 7.0.14 is installed and configured. The installation program pauses as questions are presented so you can read the information and make your choice. When you are ready to continue, press Enter (Return on some keyboards).Hit enter to continue, accept default value for the Installation Directory, which will be /home/{user}/oracle/webserver7. At the Select Type of Installation, press enter to accept Express installation option. Accept the default Administrator user name [admin] and proceed to specify your password for this web server Administrator account. Accept the default [yes] when asked to install the server components. Hit Enter again to start installing.Some questions require that you provide more detailed information. Some questions also display default values in brackets []. For example, yes is the default answer to the following question: Are you sure? [yes] To accept the default, press Enter. To provide a different answer, type the information at the command prompt and then press Enter.
When the progress indicator hits 100%, your installation is complete.
Installing Oracle iPlanet Web Server
|-1%--------------25%-----------------50%-----------------75%--------------100%|
Installation Successful.

Refer to the installation log file at:
/home/admin/oracle/webserver7/setup/install.log for more details.

Next Steps:

- You can access the Administration Console by accessing the following URL:
https://websvr01:8989
admin@websvr01:~/145844-07$

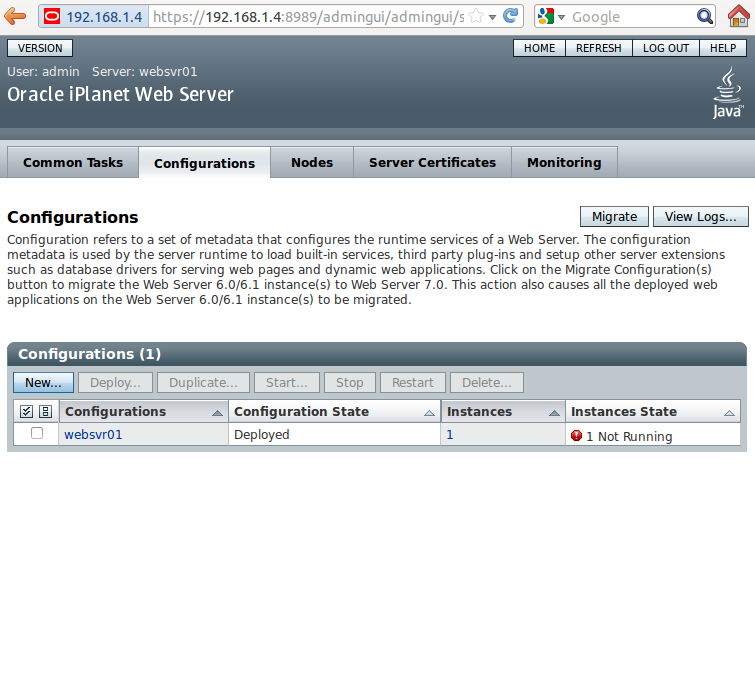
Try logging in using the credential you created during installation; User Name=admin and Password=yourpassword you should see the configuration main screen.

The installation procedure has actually created an instance of a virtual server called 'websvr01' (or your hostname), but would not start it. You need to start it if you want to see how it look for the virtual server.
To start the virtual server, either use command line:
admin@websvr01:~$ cd ~/oracle/webserver7/https-websvr01/bin/
admin@websvr01:~/oracle/webserver7/https-websvr01/bin$ ./startserv
Oracle iPlanet Web Server 7.0.14 B02/13/2012 21:44
info: CORE5076: Using [Java HotSpot(TM) Server VM, Version 1.6.0_24] from [Sun Microsystems Inc.]
info: HTTP3072: http-listener-1: http://websvr01:8080 ready to accept requests
info: CORE3274: successful server startup
admin@websvr01:~/oracle/webserver7/https-websvr01/bin$
Or through the admin console, go to the configuration->instance tab and start the server there.

Browse to the http://websvr01:8080 you should see your new shiny iPlanet landing page.

Well that is it, an iPlanet (formerly Sun Java Web Server) installed in a Solaris 11 zone.
Cheers,
No comments:
Post a Comment